Ciao & Welcome!
Leigh
Follow Me on Pinterest
Showing posts with label homemade. Show all posts

January 4, 2015

HOMEMADE WOODEN KIDS PLAYHOUSE

We wanted to give our girls a playhouse for Christmas to have in their playroom.  When we started looking on Amazon at the prices and assembly requirements, the hubby decided that he would make it from scratch himself.
It took him about 3 months to complete, working an average of 2 days per week.  He designed it himself, cut all of the pieces, sanded it himself, painted/stained it himself, and assembled it with my Dad's assistance.  It was quite interesting moving the walls and roof pieces up the stairs from the garage, but we figured it out.  He assembled it on Christmas Eve while the girls were napping at my parents' house.  
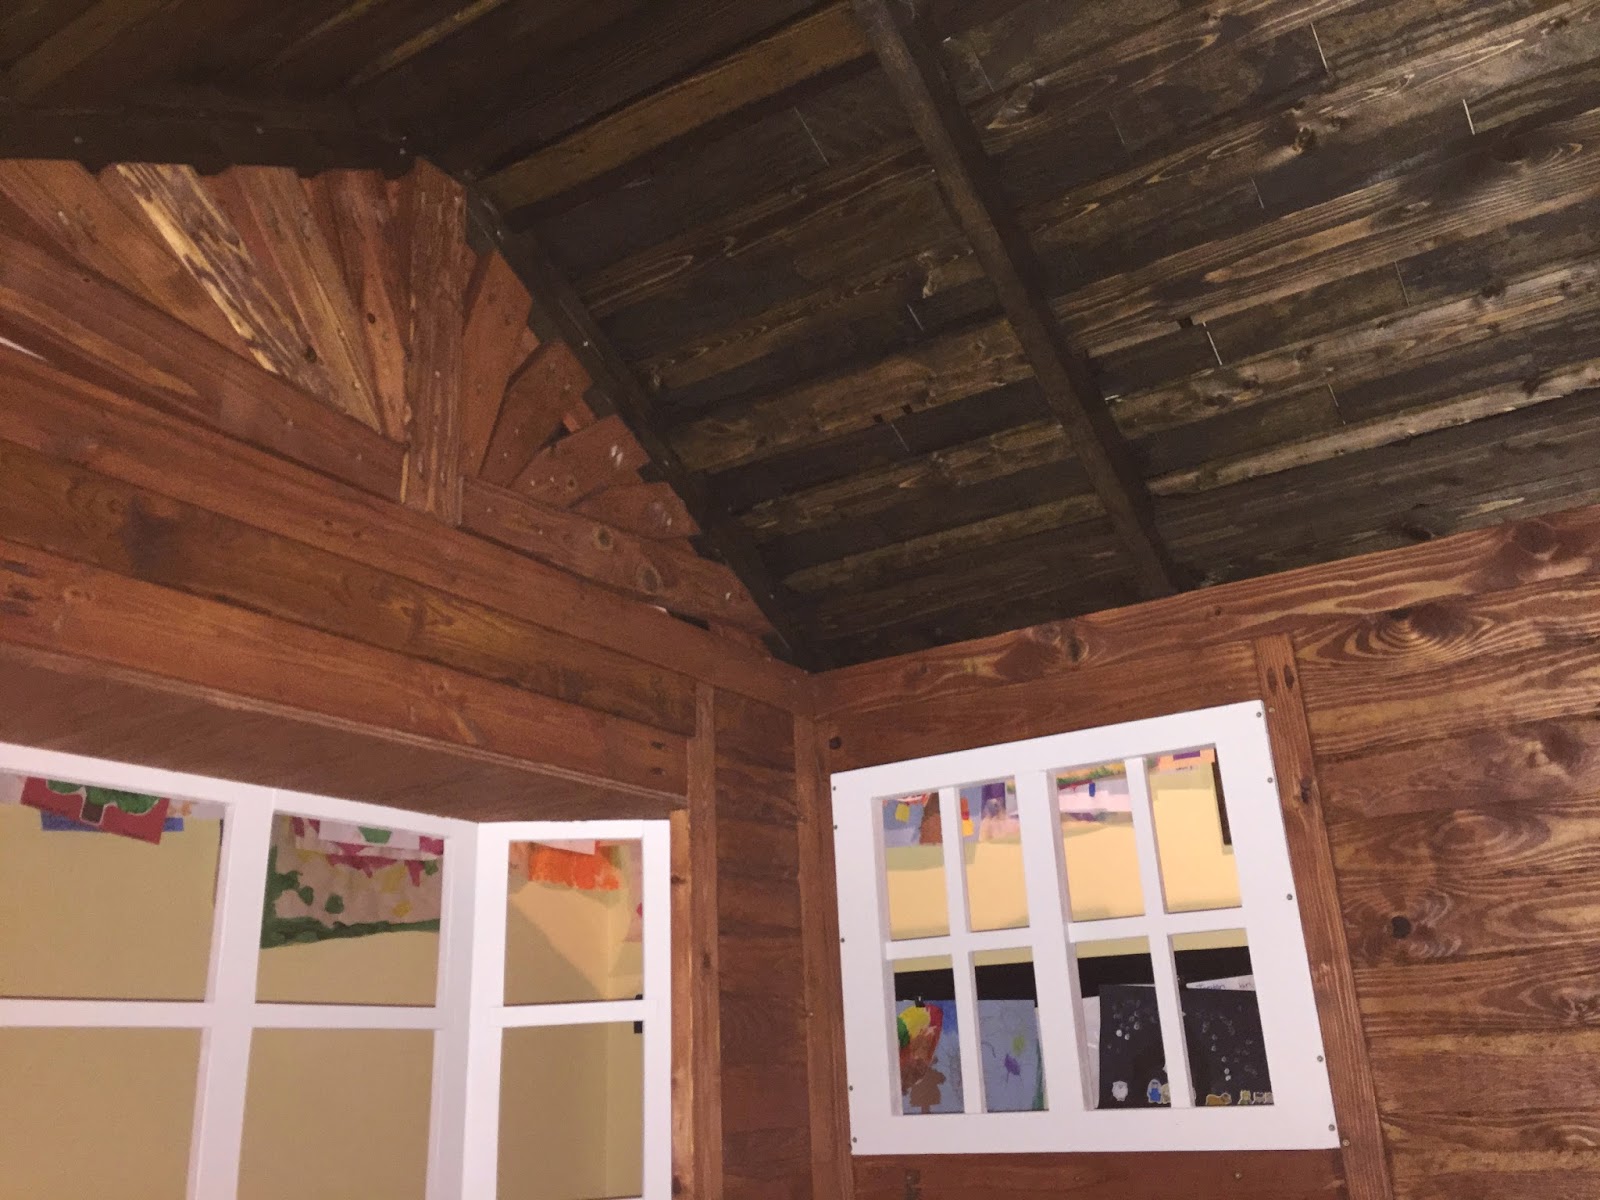
It has a bar, bay window, windows with flower boxes, front door, very high ceilings, and custom shingles for the roof.  The only thing that the hubs wanted to possibly add -->
 a light for the inside ceiling.
My sis-in-law created the green pot and purple flowers using materials from hobby lobby (tissue paper for the flowers).  She also made the sign hanging over the door out of burlap and hand painted the letters.  Thanks to her for her awesome creativity!
 Needless to say, they loved it on Christmas morning and said, "Thank you, Daddy, for our new house."  


HOMEMADE PICTURE FRAME FOR DOGS

My brother and sis-in-law have the most beautiful dogs.  They also have just about everything they need.  SO, it was an easy decision to create something for them for Christmas using pictures of their awesome dogs.  My hubby made the frame from leftover wood flooring.  He carved the bones on the frames using his band saw, chisel, sandpaper, and lots of patience.  The bones are mounted using short wood screws.  The frame is held together using wood glue.  He stained it walnut.


August 26, 2014

OAK STEREO CABINET WITH OLD RECORDS

We needed a place to put some of our stereo equipment and get it off the floor in the music room.  Hubby designed and built this cabinet using very old oak that we found at a flea market, leftover oak floor pieces, and old records (Pink Floyd, Black Sabbath, and Iron Maiden).  He used black paint on the inside and walnut stain on the outside. I just love it.  It is one of his most creative pieces to date.


COUCH END TABLE

We needed a better end table for the family room.  The hubs designed this one and built it using Japanese joints (no nails or screws, only interlocking wood and glue).  We wanted it to be functional and appealing to the eye.  There is a bottom shelf for storing our laptops.  
I think it turned out pretty well.


April 7, 2013

HOMEMADE WOODEN HEADBOARD

We found the idea for this headboard on google images.  It took some planning to execute, but it ended up being worth the time and effort.  The longest part was waiting for the glue to dry when gluing all of the wood pieces together.  It took a long time to sand, stain, and poly.  My hubby hand-carved the "M."


SIMPLE DECOR PROJECT

I found this project on Pinterest a few months back and thought it was a cute idea.  Very simple, yet unique.  I just made the table top out of wood glued together, sanded, stained, and polyed.  The table is sitting on top of two white columns that someone gave me for free.  The picture frames are hanging from a curtain rod mounted to the wall.  I stapled some ribbon to the back of the picture frames and then tied them onto the rod.  This is sitting in the corner of our master bedroom.


CORK PROJECTS

We collected several wine corks and I wanted to do something with them besides leave them in a vase or a jar.  Here are a couple of ideas.

I have this hanging in my sewing room and plan to use it for little notes pinned to it.  I just glued the corks with wood glue to a yardstick.


This is LOVE sign is hanging in our master bedroom.  I glued the corks to a scrap piece of plywood that the hubby had in the leftover in the garage.

HOMEMADE TV STAND - PART 3

We finally got around to adding the top part of the TV stand.  To see the beginning of this, see Part 1 and Part 2.
 It sure does make a difference in the room and allows for more storage.
Here is the finished product with a few in progress pics below.


Here are a couple of pictures in progress of adding the trim.  We glued the trim and then painted and touched up to finish.


February 16, 2013

REUSE CANDLE JAR - REMOVE WAX

Another project complete from PINTEREST.
Just follow these steps and it works great!
As you can see, I use my clean jar to hold my hair ties (Emi-Jay).


January 12, 2013

HOMEMADE CORK LETTER

We have been collecting corks for a long time.  Pinterest gave me the idea for making this project.


Luckily, my hubby is extremely creative and didn't mind gluing them together.  Before gluing, he made the letter flat on the desk.  Then, he used wood glue and a small paint brush to put it together.   He completed the letter in sections and allowed each section to dry before gluing the next.  


December 20, 2012

HOMEMADE TV STAND - PART 2

Now the TV stand has doors.  YAY for extra storage to hide toys or stereo equipment!
The next part will be to add a bookcase/built-in on top that goes up the wall.


December 15, 2012

HOMEMADE TV STAND

My hubby started making the "built-ins" for our living room.  We have a huge fireplace in the middle of the wall that we wanted to use for the TV, so he got creative and started a massive project.  This is the first piece of it...it still needs doors and will have a top piece going up the wall above it.  We save a lot of money with his creations.


SIMPLE PLATE DECOR PROJECT

PINTEREST inspired this project.  My mom has great handwriting, so I asked her to help.
Materials:  plates from Target, black Sharpie pen, nice handwriting, plate stand.


ABC WALL IN KIDS PLAYROOM

Another great idea from PINTEREST!
Love this decoration for the playroom.
We bought the letters from Hobby Lobby.  A few of them were wooden, so we painted them different colors.  Then you just creatively hang them up with nails. EASY and FUN!


TODDLER FINGER PAINT ART

Got this idea from PINTEREST as well!
Julia loved making it and it is a beautiful piece of art hanging in the playroom.
Materials needed:
blank canvas from Hobby Lobby, tape off the name/word you want, finger paint, and your toddler.
After they paint, let it dry and peel off the tape - VOILA!


I cut a hole in the bottom of a garbage sack to use for clothing protection and put a few garbage sacks on the floor to protect the floor.


Here it is hanging up in the ART area of the playroom.